Peaceful Mindful Pocket App Guide
This blog provides step by step details on how to navigate and utilize all the features provided to you on the zero based budgeting app, Peaceful Mindful Pocket.
1013 Words Yes - Test 4 Minutes, 36 Seconds
2025-01-21 15:30 -0500
Guide on How to Operate and Utilize Peaceful Mindful Pocket
It can be a bit confusing to start working with a new app, so we wanted to put together a quick guide for you to cover every step in the process - from setting up, to utilizing new features.
Let’s start with the first step:
How to Connect Your Bank Account
When you login to your main dashboard you will see quite a few things. At the top will be a banner reflecting the amount of days remaining in your trial period. The next box down is what we call the summary section and it shows you the title of your Budget (the standard template calls this My First Budget). Next to the title, you will see an icon of a folder, and a gear/settings icon.
![]()
Click on the Gear/Settings icon.
- You will have a page pop up that’s titled “Connect Your Bank Accounts” - this will provide you the option to connect a Primary Checking Account, along with up to 3 Credit Cards.
- Under “Primary Checking Account” click “Connect Checking Account” (Note here, there is currently a red light next to the word “Not Connected” - this is a visual indicator which let’s you know the connection status of your account)
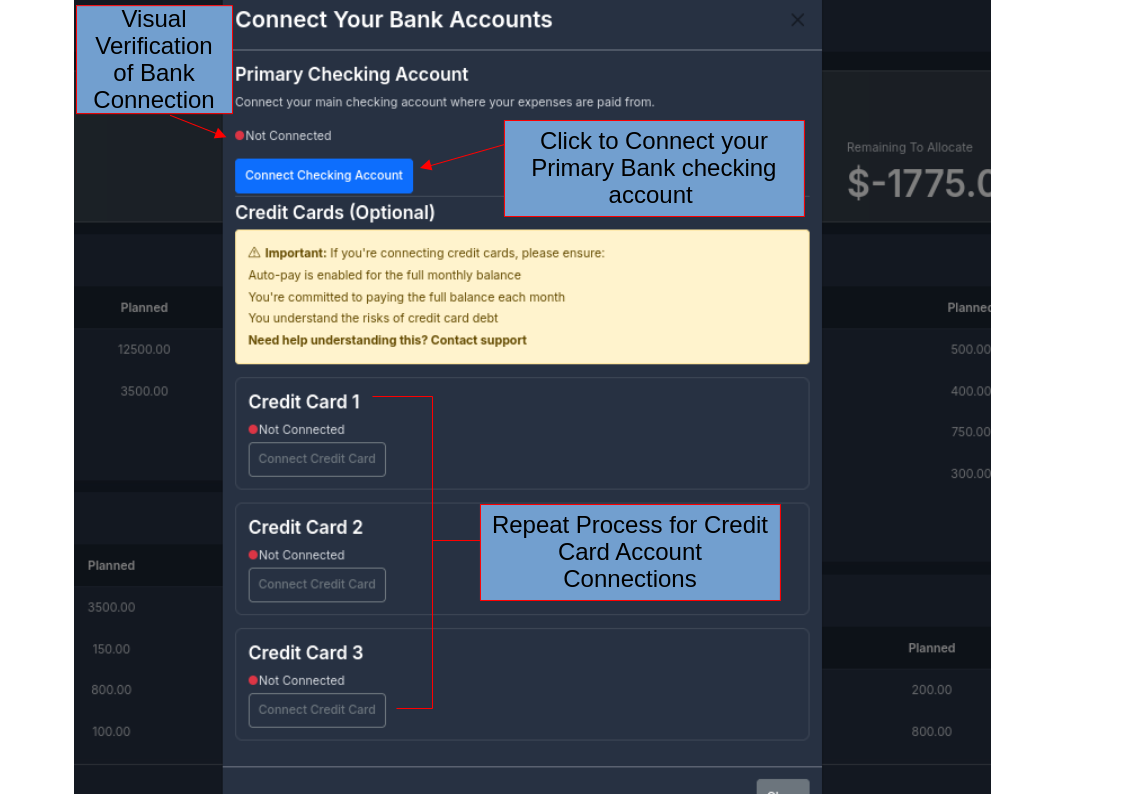
- Do not be alarmed - Volkan Tas is the owner and founder of Peaceful Mindful Pocket, and Stripe is currently setup under his name.
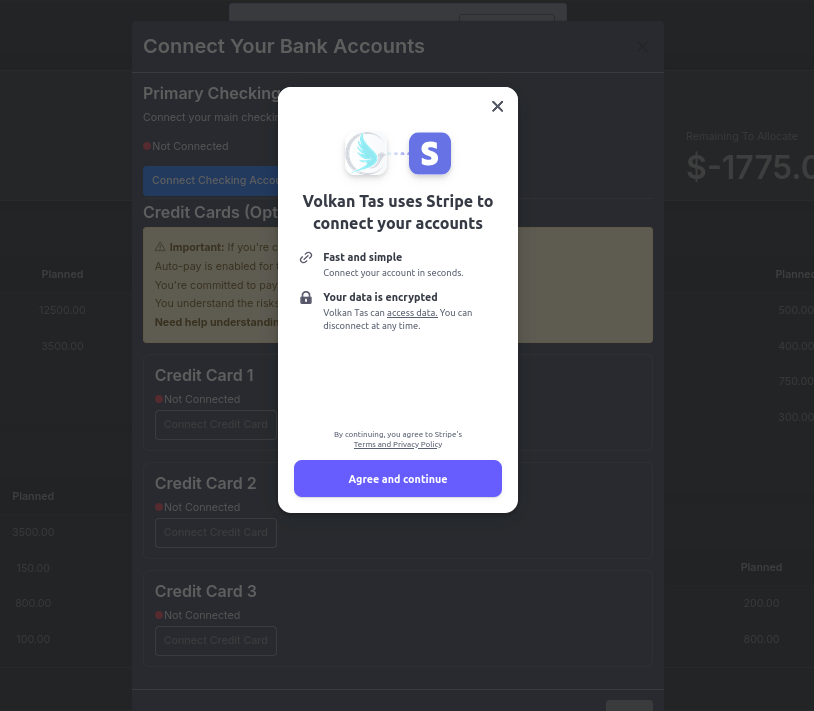
- Click Agree and Continue to proceed
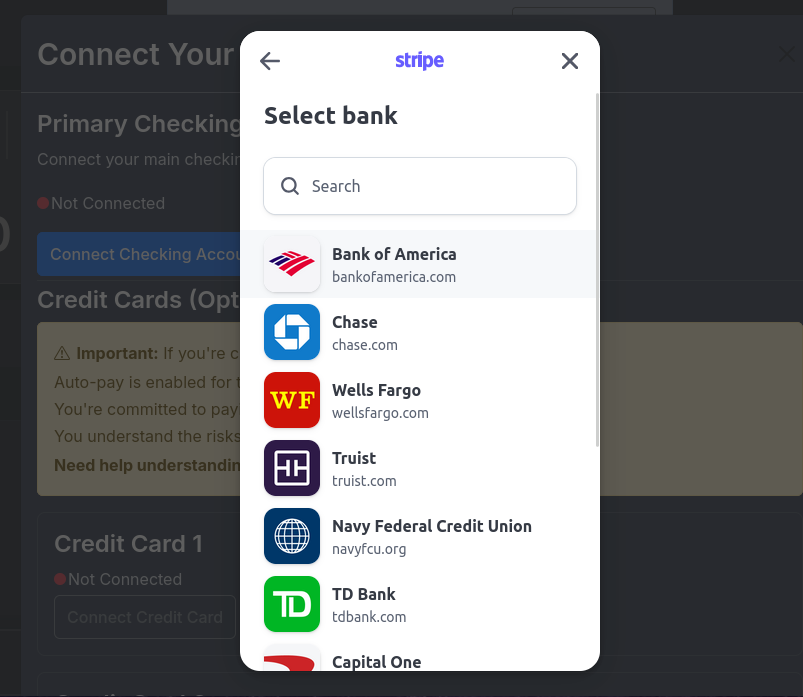
- Search for your bank on the search box.
- Type in your Bank name, and select it from the drop down list
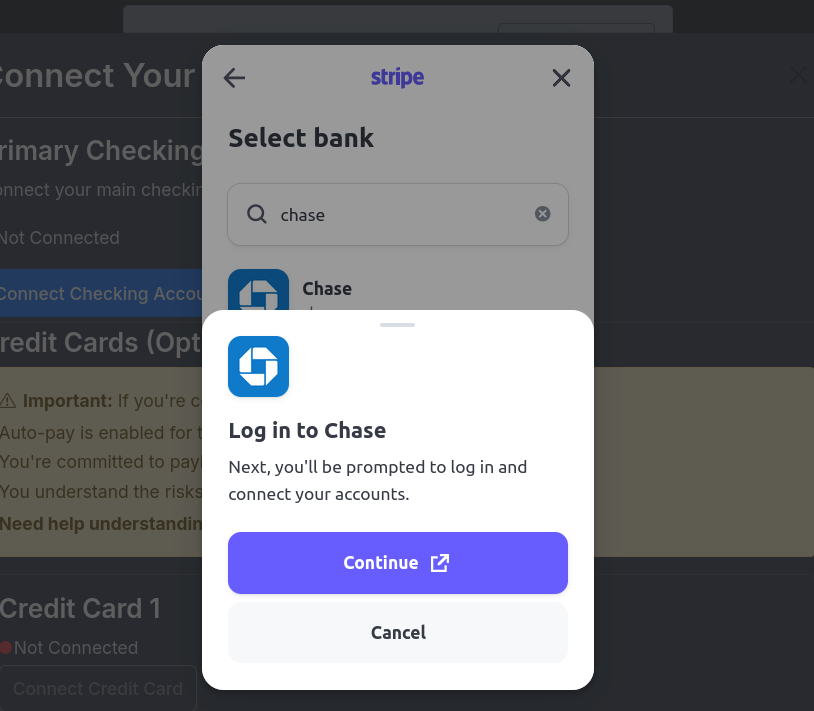
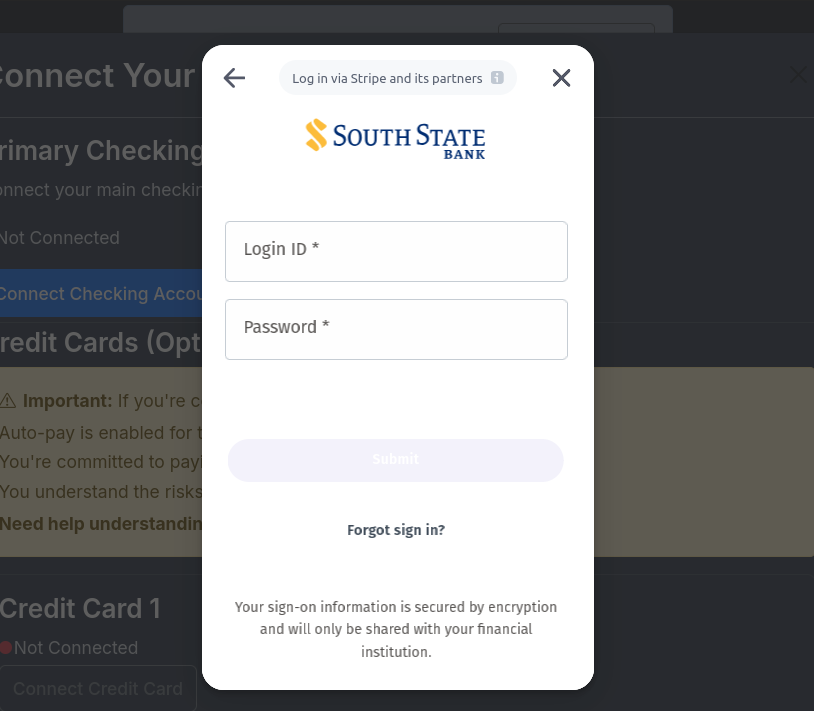
- You will be requested to add your banks login information: your login ID along with your password.
- As a reminder - Peaceful Mindful Pocket has no access to see any of your banking login information. This is purely handled by Stripe, which is a highly reputable financial service provider. There will be different prompts for this depending on the bank you’ve selected. Chase for instance will open a new secure browser to enter your information, while a different bank may continue the process without any new browsers opening.
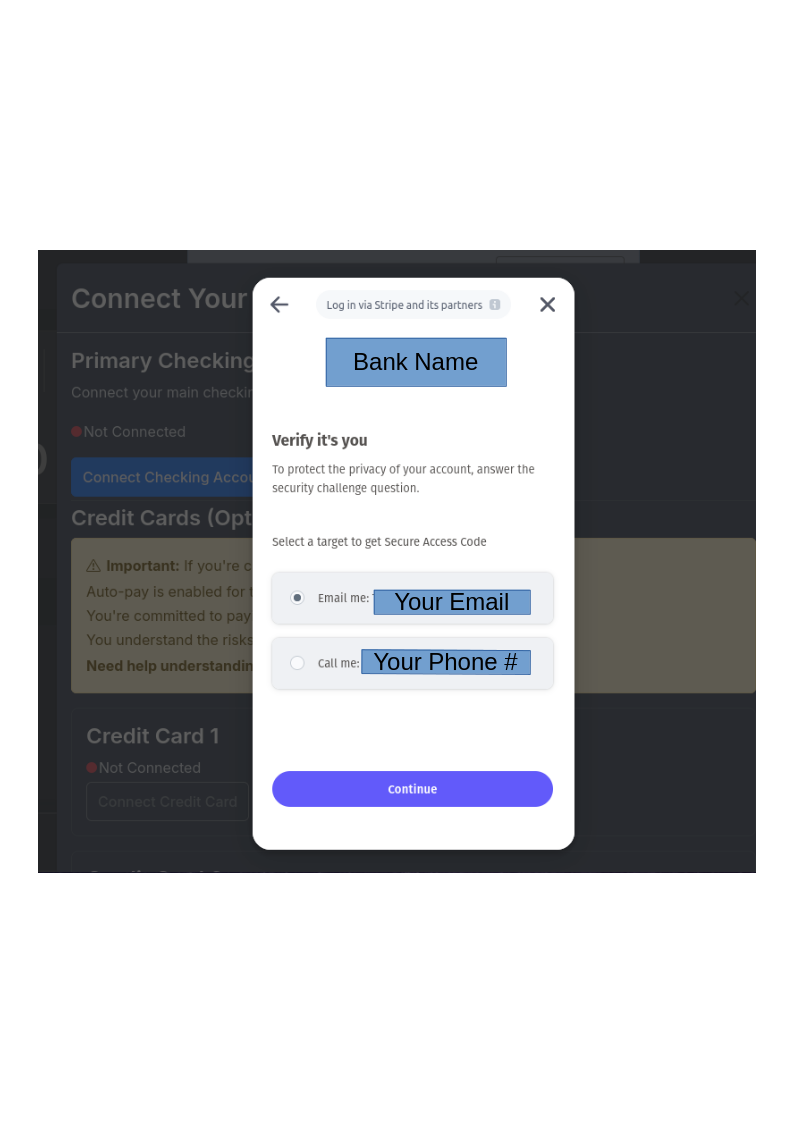
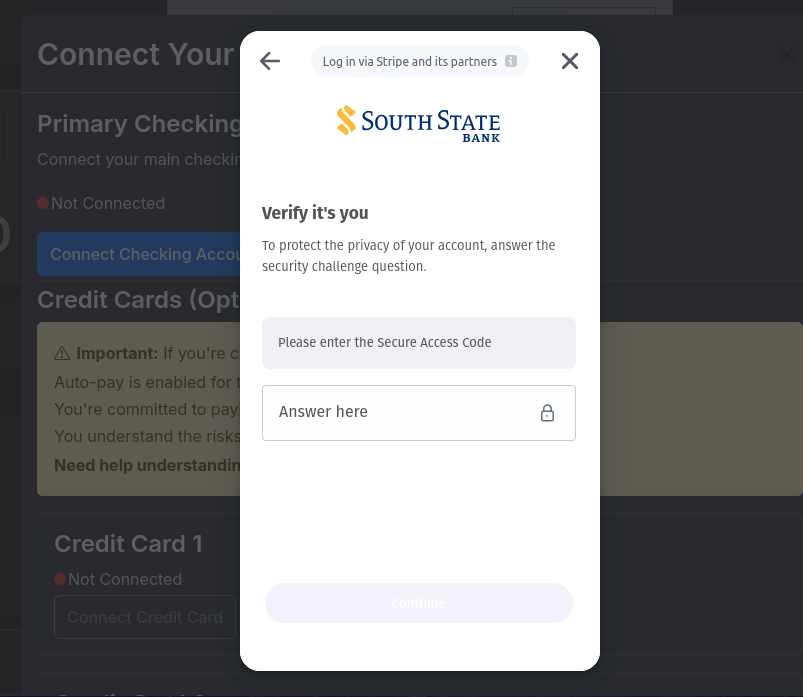
- Stripe will then go through a verification procedure that will include sending a message with a security code to your selected source
- Once your account is connected, Stripe will provide you the option to also connect to “Stripe Link” - you do not have to do this, and our app does not need this for anything, so feel free to press skip.
A Guide to the Main Budget Dashboard Features
We will go through describing each function throughout the dashboard and it’s purpose.
Summary Section
- In the Summary section you will see four main functions. The budget title, followed by a folder icon, a gear/settings icon, and lastly the Month/Year that the budget is referring to. Note: the banner at the top indicating the amount of days left in your trial period will only be displayed during your trial period, and will disappear once you’ve chosen a plan.
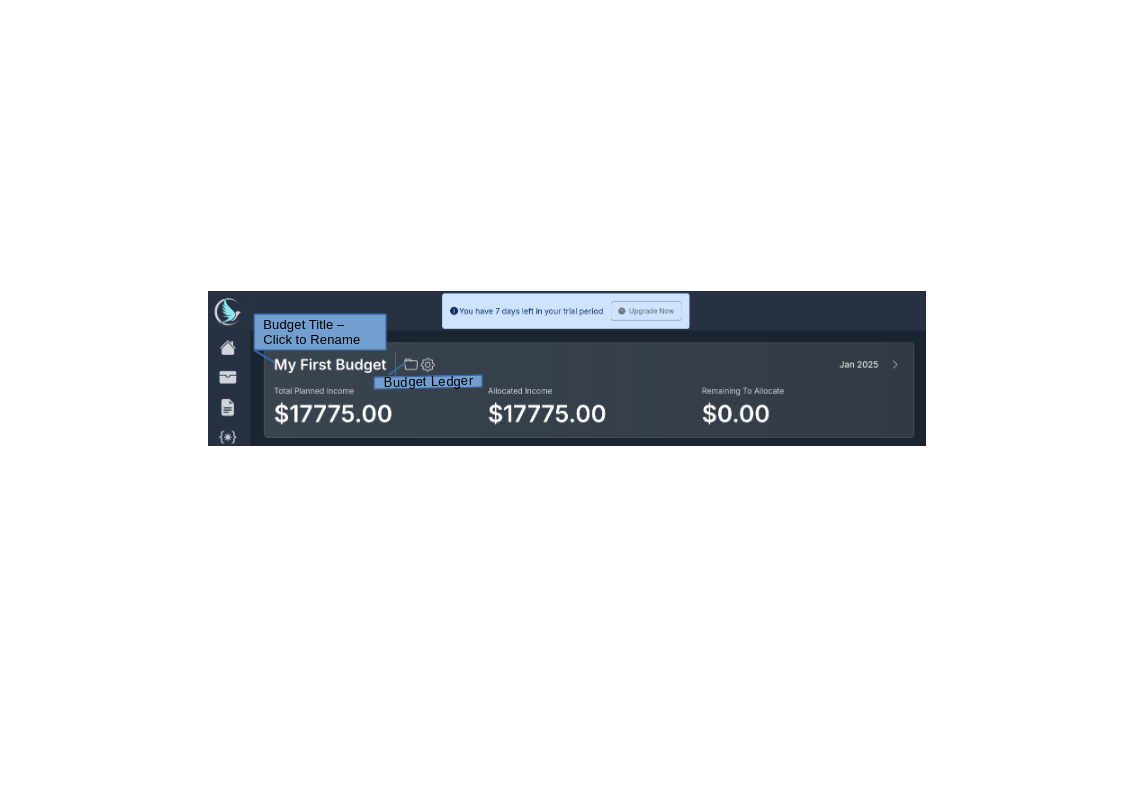
- The Budget title can be clicked to edit/rename to your own custom title.
- The folder icon located next to the Budget title will open a Budget Ledger. The budget ledger tracks all events you have taken on your budget, from changing planned amounts to renaming budgets, categories or buckets to splitting transactions. In the future you will also be able to add notes to these events, so that you can better track the specific purpose for a change being made. This can be used to help you understand changes during future review processes.
- We described the settings icon in the “How To Connect Your Bank Account” section, but clicking this will provide you access to connecting your banking information (primary account and up to three credit card accounts)
- Lastly note the Month/Year - This is referring the current budget dates you are working on.
- There are left and right arrows to the left and right of the budget Month and Year. These are your navigation buttons to go to either previous or next months budget. In the case of pressing the next budget button, if the next budget does not exist, it will instead prompt you to create a new budget.
Main Board
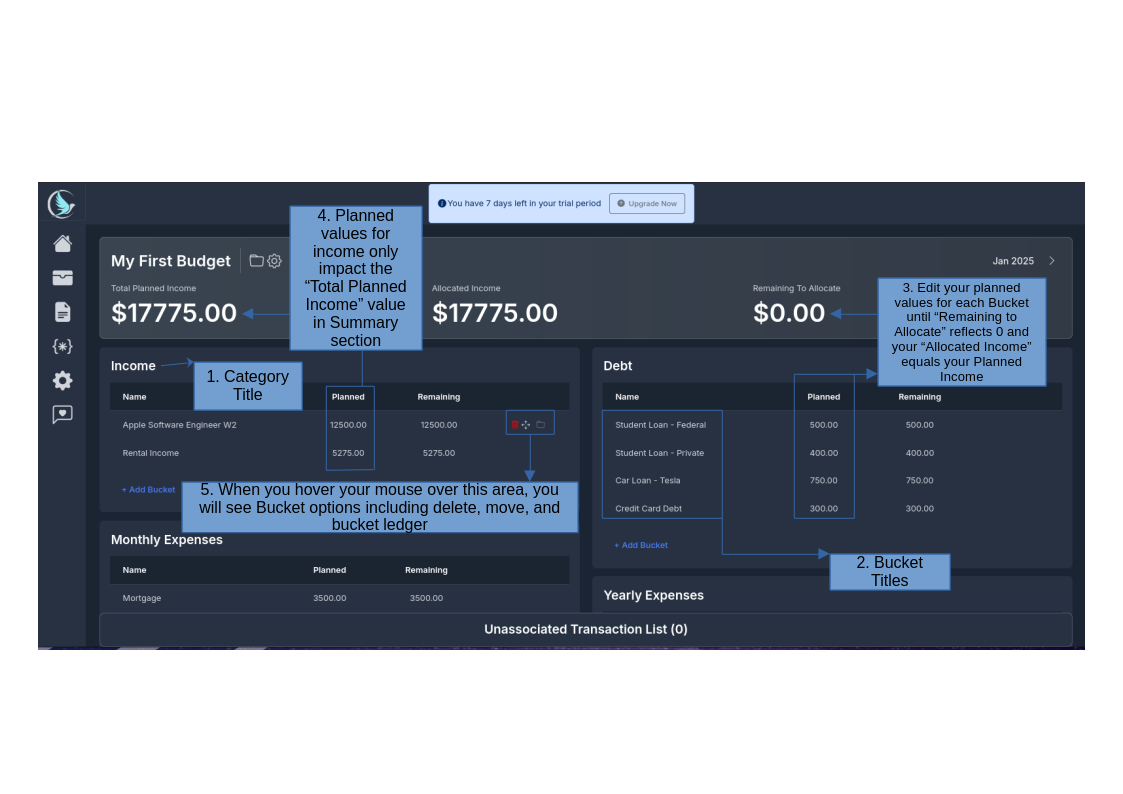
As you look down to the remainder of the page you will notice several boxes - these are what we refer to as your “Categories”. We have provided you with a template of Categories to start your budget with, but feel free to edit the titles (Except for Income/Debt) or add new Categories as necessary.
Think of Categories as the main chapters in your financial story, that help you organize your money at a high level, like “Income”, “Monthly Expenses”, “Giving”, or “Debt”
As you look into a Category box - you will see a table noting Name, Planned, and Remaining - that represent the details of what we refer to as “Buckets.”
A Bucket is a subdivision of a Category, like a subchapter in a book. It provides the details to help you track specific expenses more precisely. For example, under “Monthly Expenses” category, you may have Buckets for Mortgage/Rent, Groceries, and your Internet bills, whereas a “Giving” category would have buckets such as “Charitable Causes” or “Church/Mosque/Other Donation”
Adding Categories and Buckets
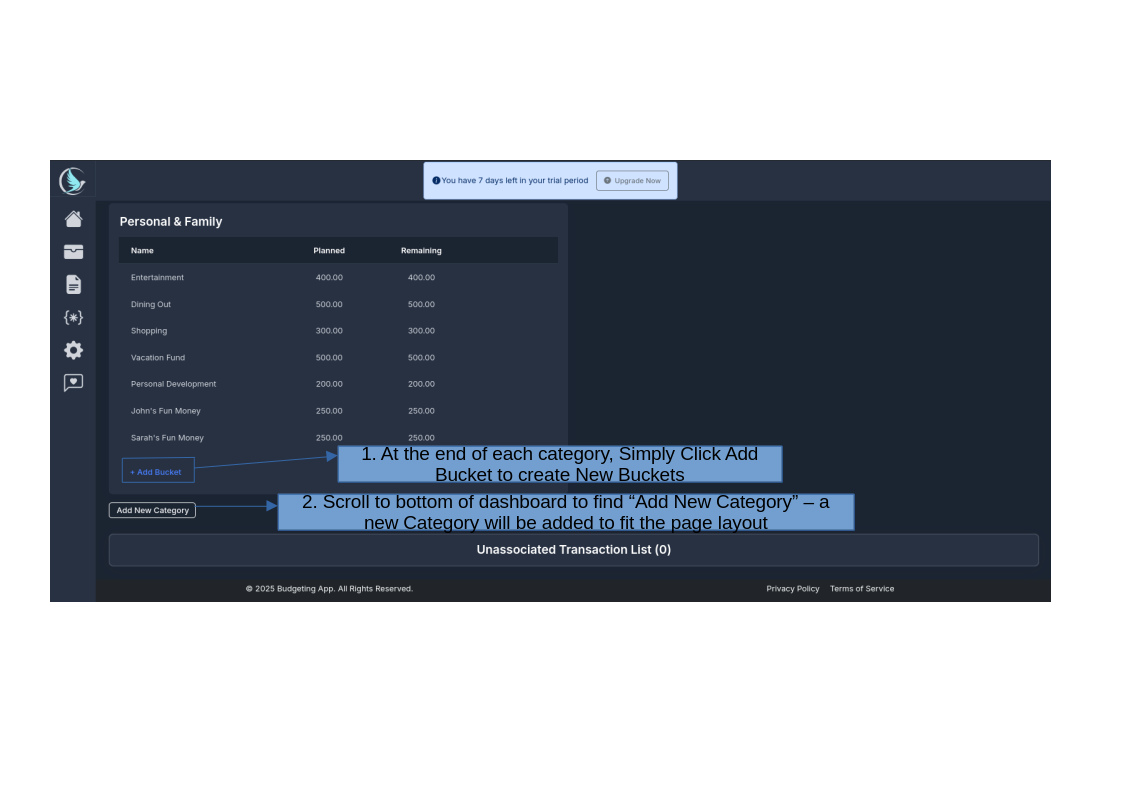
- At the end of each Category box, you will find an “+Add Bucket” function. Simply click it to form a new Bucket line.
- To create a new Category, scroll to the bottom of the dashboard to find “Add New Category”. Simply click and a new Category box will be added (it will appear to the top right to fit the page layout)
Allocating Transactions
Once you’ve connected to your bank account, transactions will appear in the final section titled “Unassociated Transaction List (#)” - the # listed next to Unassociated Transactions, tells you how many transactions you have waiting to be allocated.
With our app, allocating transactions is as simple as dragging and dropping into your selected bucket. You’ll note that the Transaction List moves with your screen as you scroll, to make this easier for you.